Read in Order

  1. Speed Listing Products
  2. Bulk Product Uploading & Listing
  3. Is a Barcode Scanner Necessary?
  4. Listing and Automatic Research Options
  5. Difference Between FNSKU Labels and SKU
  6. Adding Scouts to Your Custom SKU
  7. Submit Feed Process: building shipments on Seller Central
  8. Completing a Batch with Multiple Shipping Locations
  9. How to List and Pack Items as a Set
  10. Why Does the Mentioned Estimated Weight Seem Inaccurate?
  11. Listing Books Without ISBN Numbers
  12. Adding Missing Dimensions in Seller Central
  13. Listing a Product Directly in Seller Central
  14. Listing Replenishable Inventory
  15. Product Research
  16. Exporting Restricted or Gated Product Lists
  17. Interpreting Pricing Data
  18. Adding a Custom Research Button
  19. What Products Can be Listed on AccelerList?
  20. Do I Need an Amazon Professional Seller Account to Use AccelerList?
  21. Why isn't there a Visible Scrollbar Inside the App?
  22. Can Two Sellers List Inside AccelerList at the Same Time?
  23. Checking Your Feed Status on Completed Batches
  24. Checking for Restrictions
  25. Can I Change My SHIP FROM Address After I Completed a Batch
  26. Completing a Shipment in Seller Central After Submitting Your Batch
  27. Listing with Default or No Default Conditions
  28. Finding Products in a Batch
  29. Selecting a Default Condition
  30. Using Custom SKU Blocks or Tags
  31. Selecting Used Buy Box or New Buy Box Offers as Pricing Strategy
  32. How to Export Batch Data
  33. Submit Feed Process (Building Shipments on Seller Central)
  34. How to Return to a Batch from the Shipment Page
  35. How to Export an Inventory Loader File (ILF)
  36. Private Batch
  37. Expiration Dates
  38. Choose Your Workflow Type
  39. Duplicate ASINs in Batch
  40. Auto Expand to See SKU Detail
  41. Batch Analytics
  42. Expiration Date Product FAQ

Was this article helpful?

Listing with Default or No Default Conditions

In an effort to either speed up your listing process and/or reduce mistakes when listing, you can now choose default conditions or no default as you list products in AccelerList.

Set Default Condition Grade Per Batch

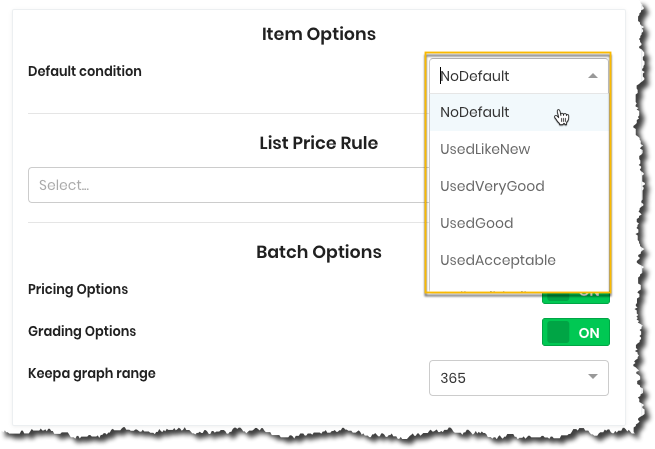
Head over to the Settings area and then toggle to Listing Settings. Choose your preferred listing condition grade and then save your selection at the bottom. Now you are ready to create your batch.


Change Default Condition Grade in Batch

If you would like to change your default condition grade while you are in the middle of the batch you can do so from the right sidebar. Simply click on the Notes tab and use the drop-down menu to change your selection.

This action will not affect or change your default global condition grade in the main settings area.


No Default Setting For Condition Grades

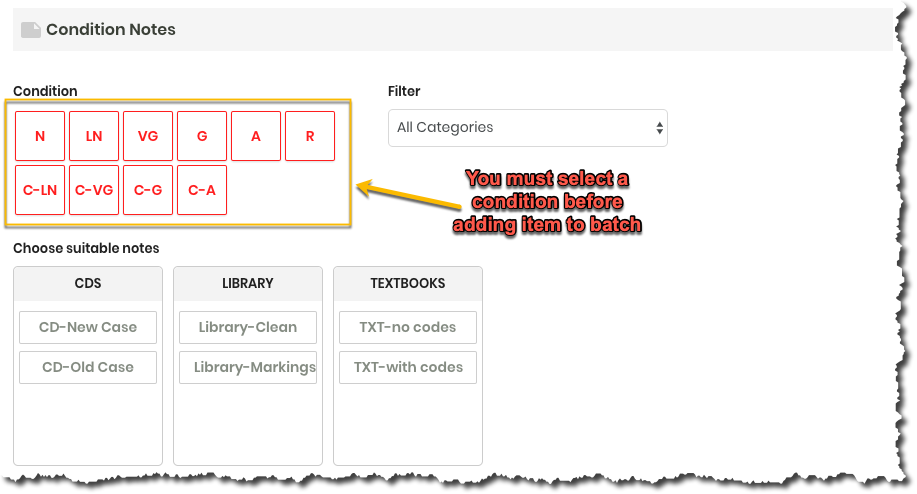
If you choose to select no condition grade for your batches then AccelerList will force you to select one each time you add a new product to the batch or until you remove this default setting.

You will be presented with red condition grade blocks to choose from as you list each of your items in a batch.


Can’t find what you’re looking for?

Our award-winning customer care team is here for you.

Contact Support