Read in Order

  1. Speed Listing Products
  2. Bulk Product Uploading & Listing
  3. Is a Barcode Scanner Necessary?
  4. Listing and Automatic Research Options
  5. Difference Between FNSKU Labels and SKU
  6. Adding Scouts to Your Custom SKU
  7. Submit Feed Process: building shipments on Seller Central
  8. Completing a Batch with Multiple Shipping Locations
  9. How to List and Pack Items as a Set
  10. Why Does the Mentioned Estimated Weight Seem Inaccurate?
  11. Listing Books Without ISBN Numbers
  12. Adding Missing Dimensions in Seller Central
  13. Listing a Product Directly in Seller Central
  14. Listing Replenishable Inventory
  15. Product Research
  16. Exporting Restricted or Gated Product Lists
  17. Interpreting Pricing Data
  18. Adding a Custom Research Button
  19. What Products Can be Listed on AccelerList?
  20. Do I Need an Amazon Professional Seller Account to Use AccelerList?
  21. Why isn't there a Visible Scrollbar Inside the App?
  22. Can Two Sellers List Inside AccelerList at the Same Time?
  23. Checking Your Feed Status on Completed Batches
  24. Checking for Restrictions
  25. Can I Change My SHIP FROM Address After I Completed a Batch
  26. Completing a Shipment in Seller Central After Submitting Your Batch
  27. Listing with Default or No Default Conditions
  28. Finding Products in a Batch
  29. Selecting a Default Condition
  30. Using Custom SKU Blocks or Tags
  31. Selecting Used Buy Box or New Buy Box Offers as Pricing Strategy
  32. How to Export Batch Data
  33. Submit Feed Process (Building Shipments on Seller Central)
  34. How to Return to a Batch from the Shipment Page
  35. How to Export an Inventory Loader File (ILF)
  36. Private Batch
  37. Expiration Dates
  38. Choose Your Workflow Type
  39. Duplicate ASINs in Batch
  40. Auto Expand to See SKU Detail
  41. Batch Analytics
  42. Expiration Date Product FAQ

Was this article helpful?

Completing a Shipment in Seller Central After Submitting Your Batch

After you have submitted your batch from AccelerList to Seller Central, it's now time to log in and finalize your working shipment so you can send the box into the Amazon fulfillment center and list the products for sale on Amazon.

Open up a new browser tab and navigate to Seller Central to begin.

Once inside, navigate to your FBA working shipments.


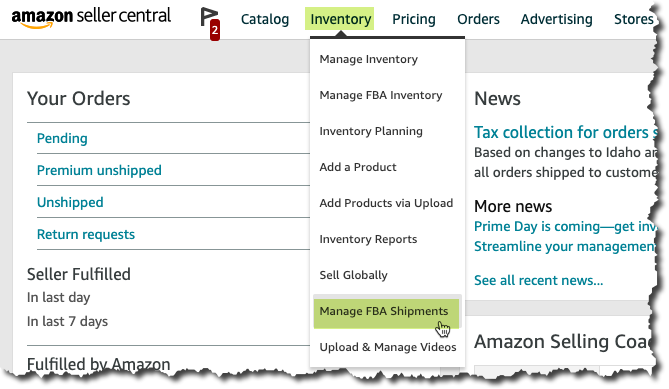
Once inside the Manage FBA Shipments page, you will see all of your shipments. They will be in various status modes from Working to others. Click on the yellow Work on Shipment button after you have found the working shipment you would like to work on.


Once inside your desired working shipment you will now see all of the important information pertaining to your shipment (or batch). There will now be some decisions that need to be made.

Send/Replenish Inventory Page

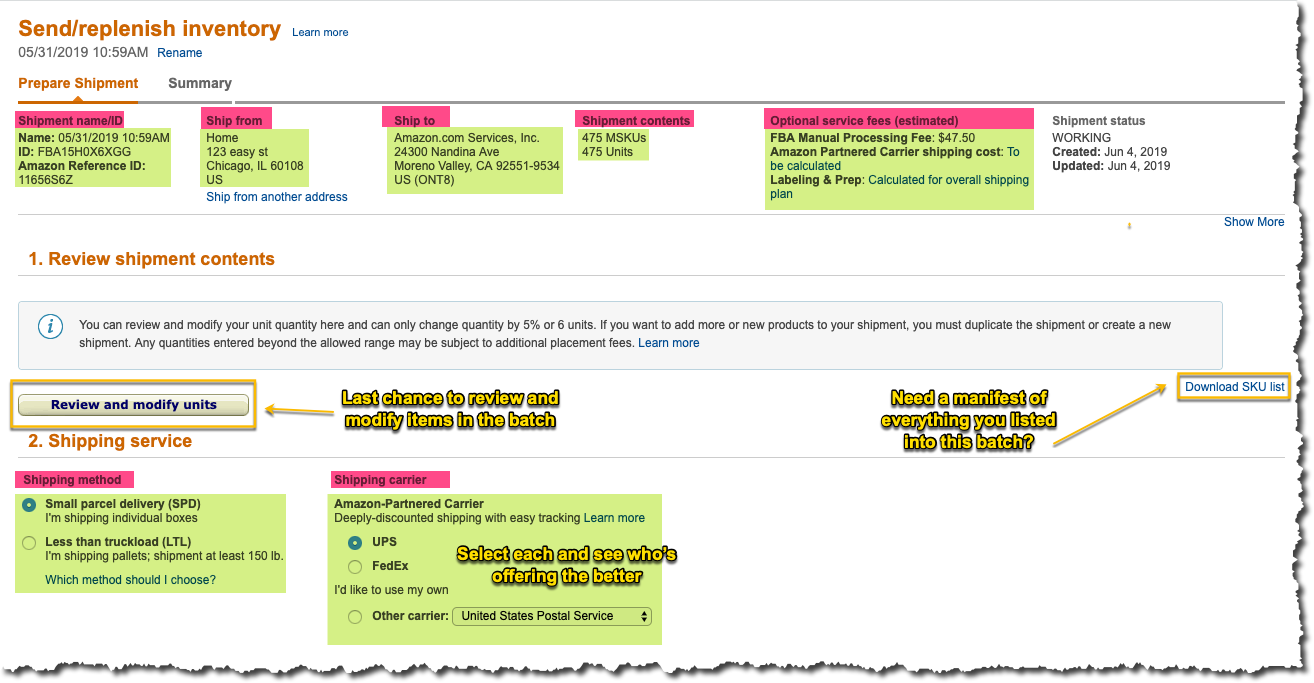
In the first section, you have an opportunity to review the individual products you have listed with AccelerList and even print a manifest of these items if needed. You will also be toggling back and forth between UPS and FedEx to determine who will give you the most favorable (less expensive) shipping fees.

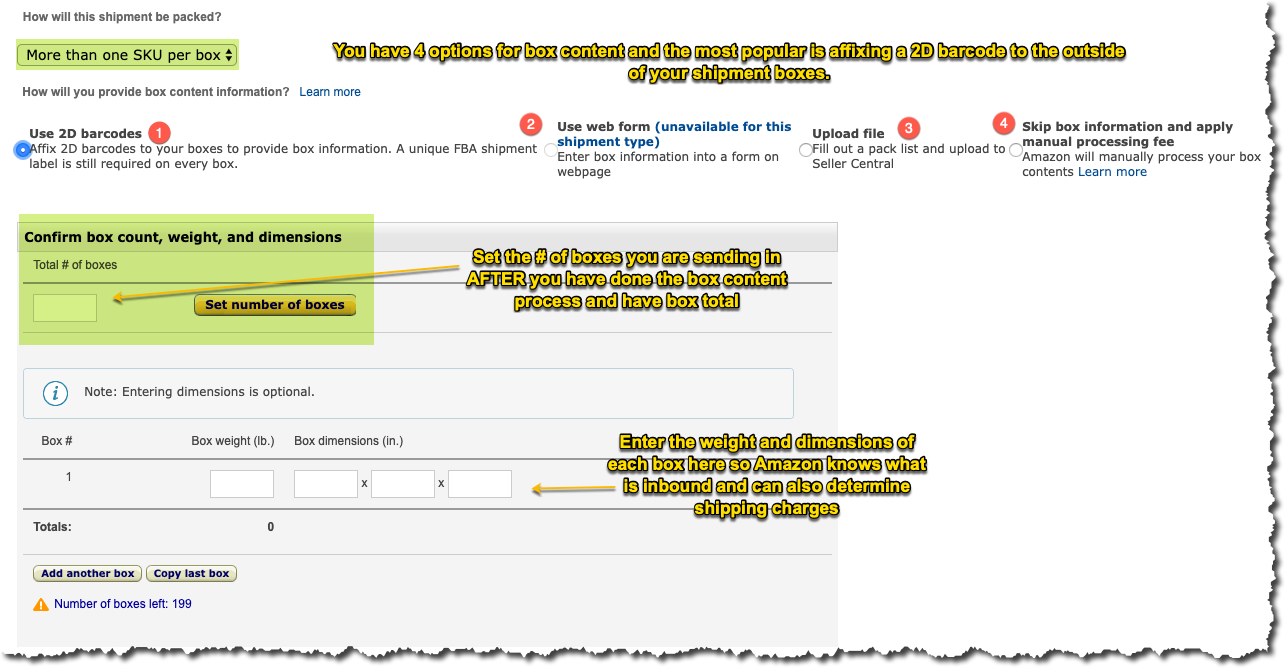
Submit Box Content Information

The next section is very important. You will need to enter your box content information for the shipment IF you are sending in more than one box. There are four options to handle box content but printing 2D barcodes are the most popular. You can do box content directly inside of AccelerList or head over to FBABoxContent.com and sign up there.

IF you are only sending in one box than you don't need to provide box content information at all. Just send the box in with the products in the box.


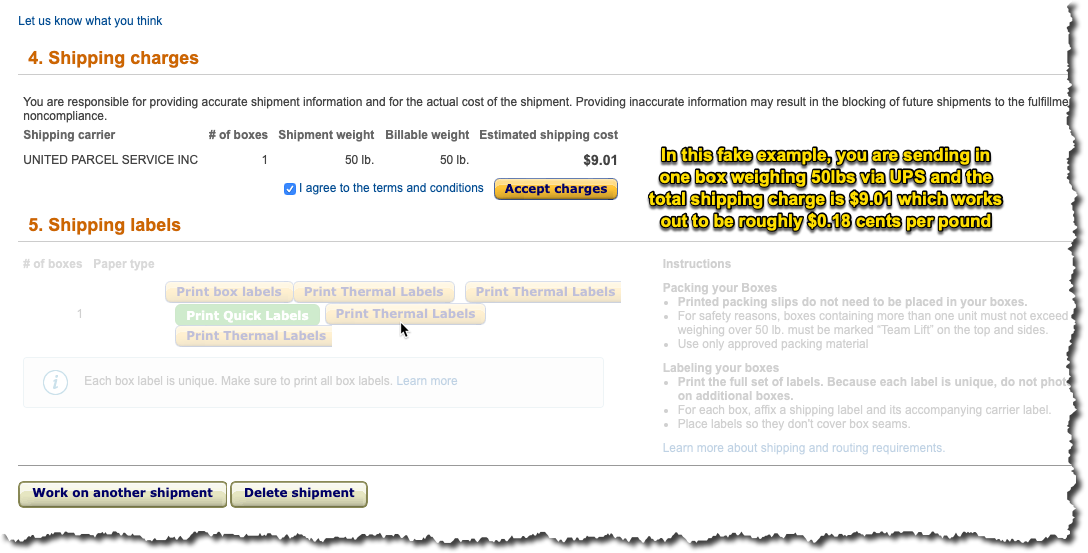
After you are finished with box content you can now wrap up by reviewing your shipping charges and finally printing your shipping label to complete the shipment and drop off at the UPS store.


Can’t find what you’re looking for?

Our award-winning customer care team is here for you.

Contact Support