If you are having trouble printing labels of the correct size for your shipment, kindly note that both Chrome and MAC OSX default to US letter format for print sizes.
If you’re a MAC user, you can use the system dialog and change the default settings for printing labels as per your requirement by following these steps:
Step 1:
Open Google Chrome and press Command ⌘ + P keys.
(Note: You can also directly jump to Step 3 by pressing Command ⌘ + Option + P keys instead)
Step 2:
The following window shall pop-up:
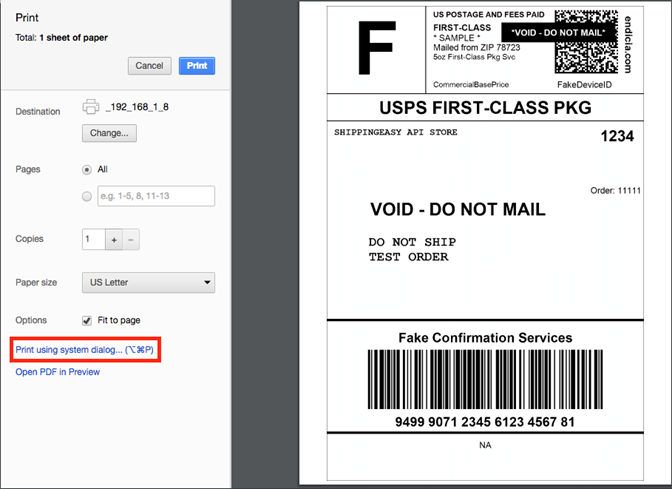
On the left hand side, click on the blue link ‘Print using system dialog’
Step 3:
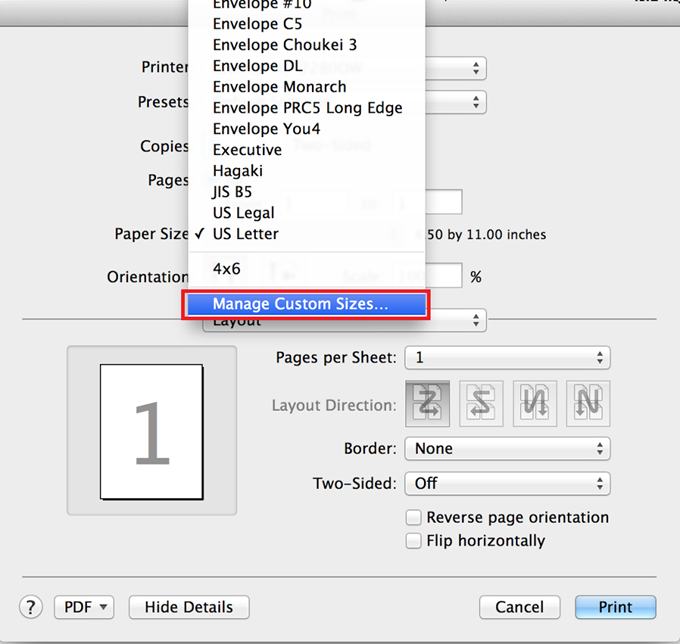
Next to ‘Paper Size’ you shall find a drop-down menu.
Here, select ‘Manage custom sizes’ from the available options.
Step 4:
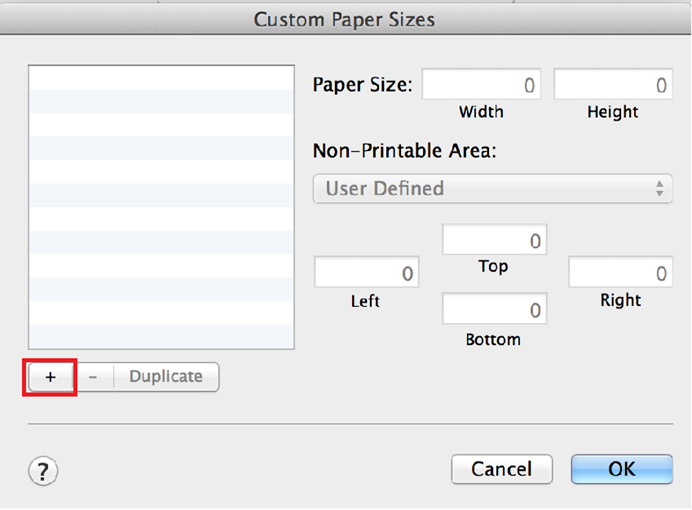
To create a new paper size, click on the ‘plus sign’ at the bottom left corner as highlighted in the image:
Step 5:
It is important to name the size something that’d be easy to refer during selection. Thus, we recommend naming it as per the paper size. Ex: 4x6
To change the name, double clicking on "Untitled" and that should allow you to rename it as required. You can slightly change the paper size margins if required (Though we highly recommend not doing so). You can let the Non-Printable area remain as ‘User Defined’

Once you’ve selected all the options as required, simply click ‘OK’.
As you do this, you’re back to the Print screen. Here press ‘Cancel’.
Step 6:
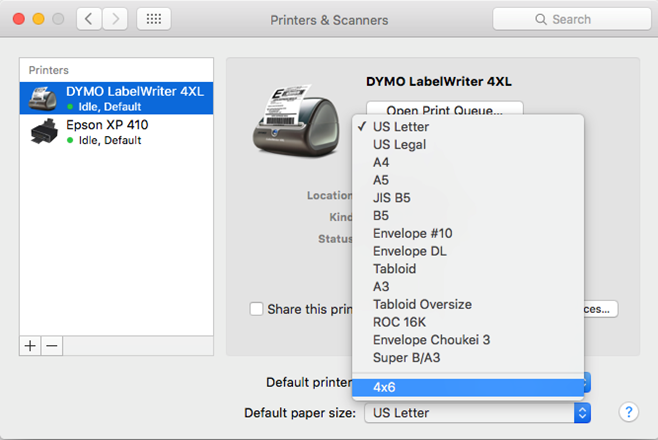
Once the above steps are followed, you can then change the default printer for your MAC device by going to System Preferences -> Printers & Scanners, and then select the ‘4x6’ template (Or any other new size that you created) from the available options.
Now as you return to Chrome, press Command ⌘ + P keys and then click on ‘Print using System dialog’, and finally click ‘Print’ to start printing your labels.