For Windows Computer
-
Disconnect the power cable from your printer.
-
Fully delete all current driver downloads completely from your computer - This step is CRUCIAL. If you only install the correct driver version without first uninstalling the one you already have, your issue will not resolve.
If you have DYMO Connect installed, then delete DYMO Connect from your system.- Uninstall instructions for Windows 10
- Uninstall instructions for Windows 8/8.1
- Uninstall instructions for Windows 7
- Download and install the latest version of the DYMO driver (not Dymo Connect)For your convenience, the file is located below:
- Find the DYMO software download in your download folder (or the location on your computer designated for downloaded files. Double click the file and follow the install instructions.
- Once the software has been installed, make sure the DYMO software is set to run on startup.
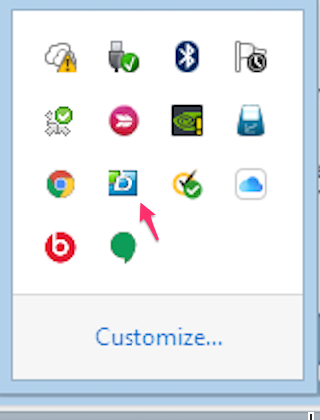
- Once the software has been installed, verify the DYMO icon is in your computer's system tray as follows:
- Plug your printer back in and turn it on after your driver has been installed.
- Make sure your printer is installed on your computer (after a driver update, many times it is not. This will cause it to not be recognized in IL)
- Windows 10->Start->Settings->Devices->Printers & Scanners->Add a Printer or Scanner
Since your printer is plugged in during this step, Windows should automatically recognize your printer to select.
- Windows 10->Start->Settings->Devices->Printers & Scanners->Add a Printer or Scanner
Log out from Accelerlist then log back in and try to print a label.
If you cannot print at this point, reboot your computer completely, plug the printer back in and try to print once more. Some systems require a full reboot for the driver update to take place.
For Mac Computers
-
Disconnect the power cable from your printer.
-
Fully delete all current driver downloads completely from your computer - This step is CRUCIAL. If you only install the correct driver version without first uninstalling the one you already have, your issue will not resolve.
- Uninstall instructions for MacOS Catalina
- Uninstall Instructions for MacOS Big Sur
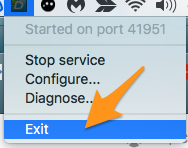
- 'Right-click your DYMO icon and choose 'Exit'
- Completely remove the older DYMO certificate from your Mac:
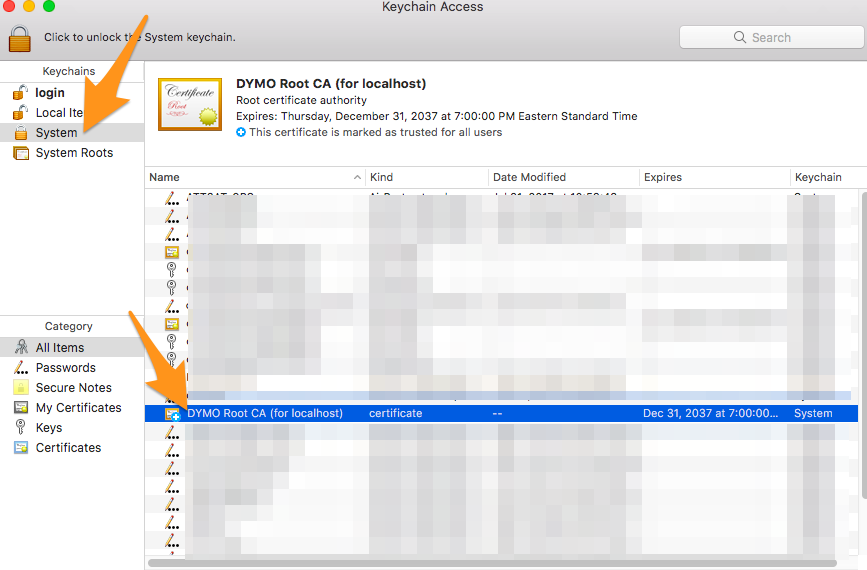
Navigate to Finder > Applications > Utilities > and open Keychain Access
In Keychain Access, click System. Look for the DYMO Root CA (for localhost) certificate and click it.
Right click and choose 'Delete DYMO Root CA (for localhost). You will need to enter your password twice.
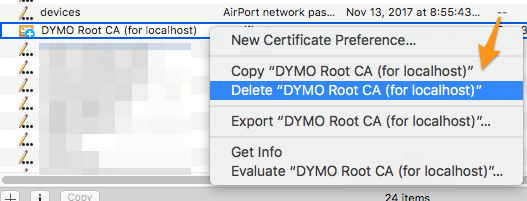
Do this for each DYMO Root CA certificate in this area.
- Download and install the latest version of DYMO. For your convenience, the files are located below:
- Find the DYMO software download in your download folder (or the location on your computer designated for downloaded files). Double click the file and follow the install instructions.
- Verify the DYMO icon is in the top menu bar on your Mac:
- Plug your printer back in and turn it on after your driver has been installed.
- Make sure your printer is installed on your computer (after a driver update, many times it is not. This will cause it to not be recognized in IL)
-
Mac->Launchpad->System Preferences->Printers & Scanners->Click the + sign in the lower right of your printer list.
Since your printer is plugged in during this step, your Mac should automatically recognize your printer to select.
-
Log out from Accelerlist and log in again then print a label.