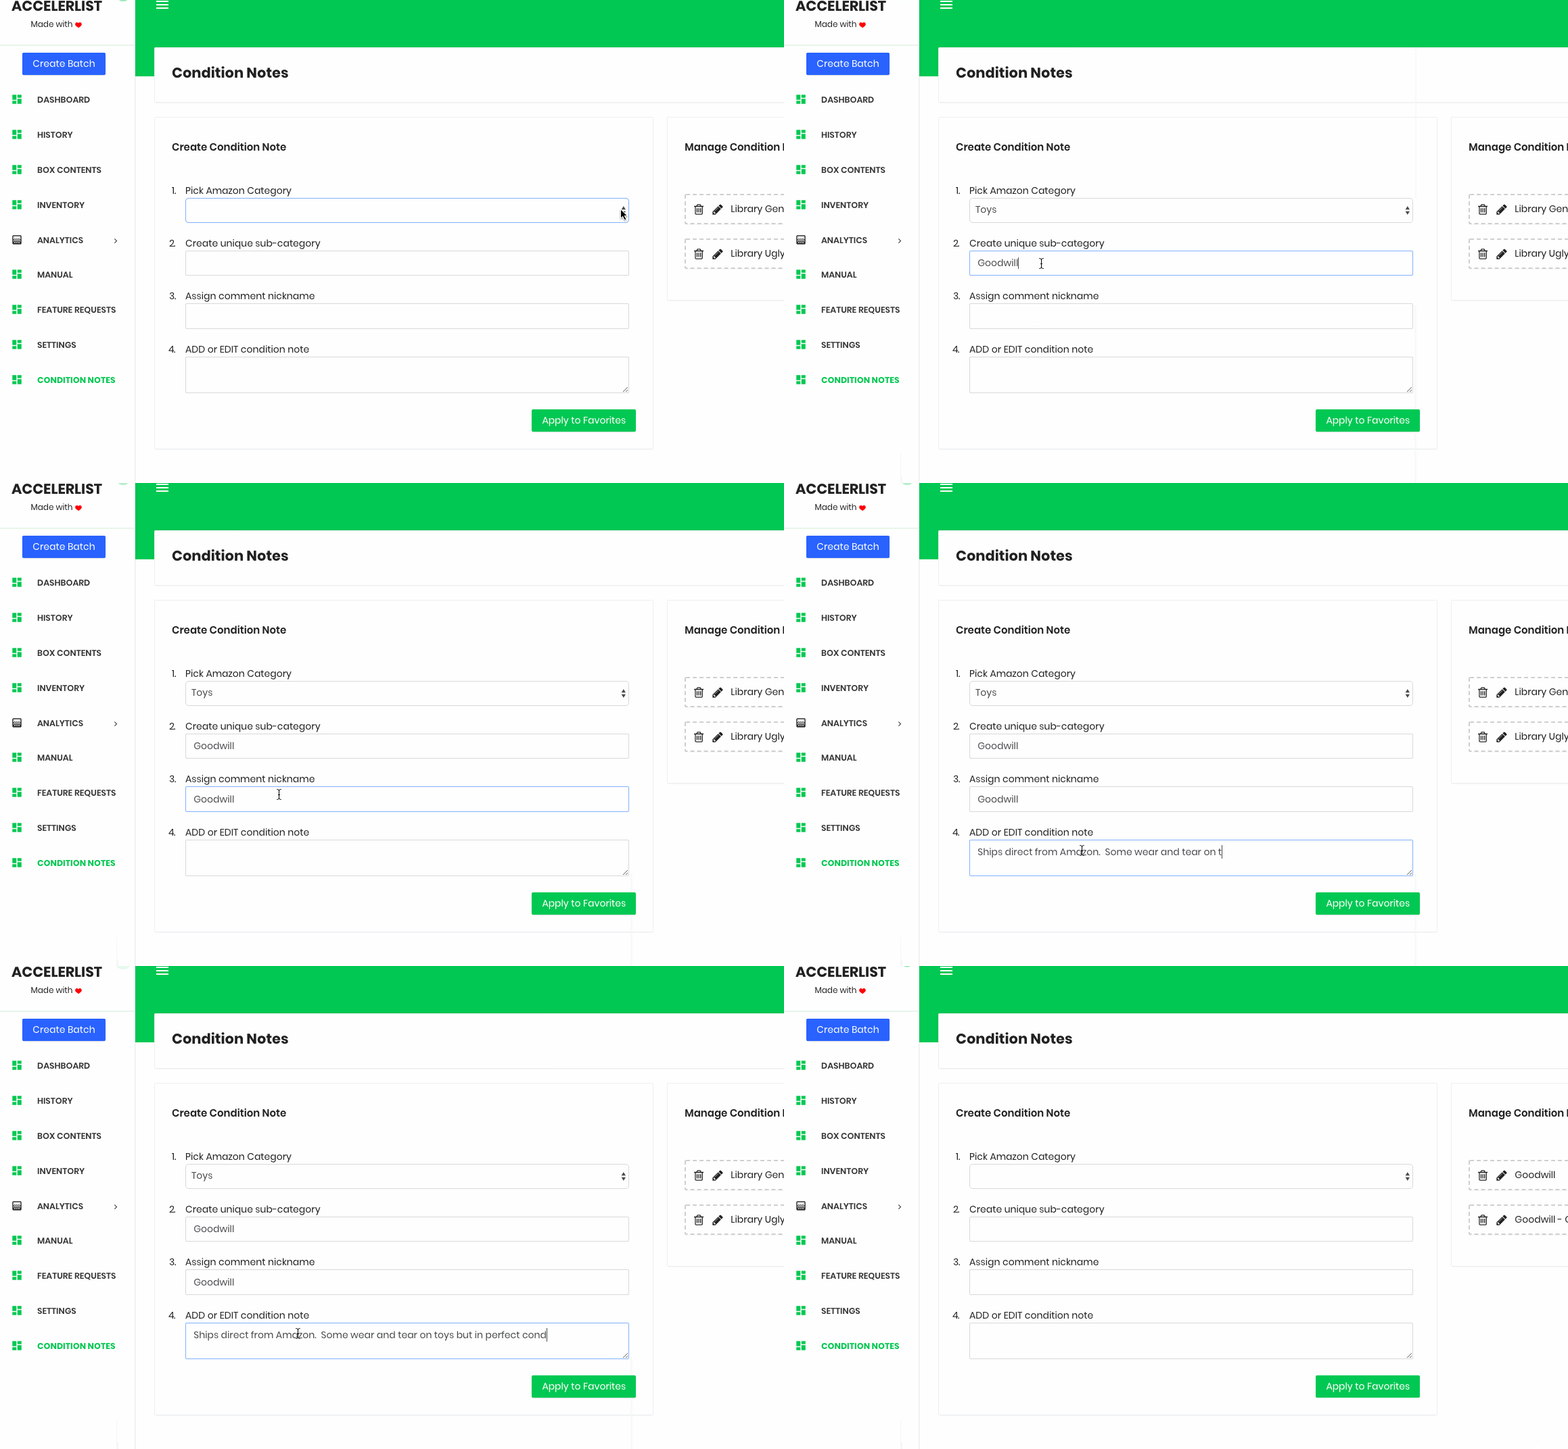
Before you begin to list any products, you will need to set up your condition notes inside of AccelerList. This can be done by navigating over to the left-hand menu and selecting Condition Notes.
Once on the condition notes page, you may start building out your condition notes to be used while listing products to the Amazon catalog.
It is our opinion that most customers or buyers on Amazon don't even read the notes. They already trust the Amazon brand and trust that Amazon will do the right thing (even at your expense) for the customer which can include authorizing a return of the product. We have been selling on Amazon for over 8+ years now and our current seller rating is 4.8 stars. We only use one note for every item we list: 100% Satisfaction Guaranteed. Ships direct from Amazon.
How to Create Condition Notes (.gif)

Condition Note Hierarchy
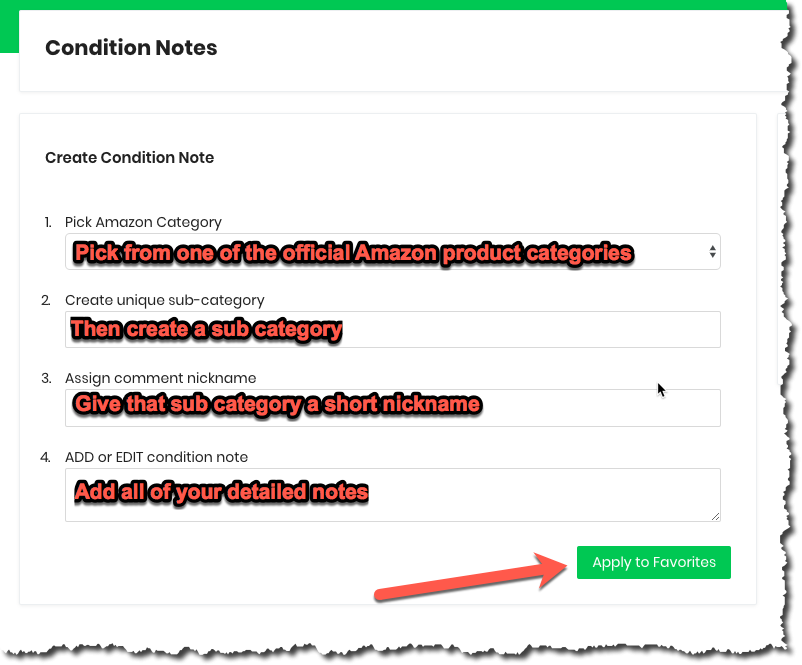
We created our condition note builder with simplicity and ease of use in mind for the seller. You will follow a logical workflow to build each note and assign it a convenient nickname for use on the main listing page. The organization of your notes will be crucial to a faster listing process.

Condition Note Examples
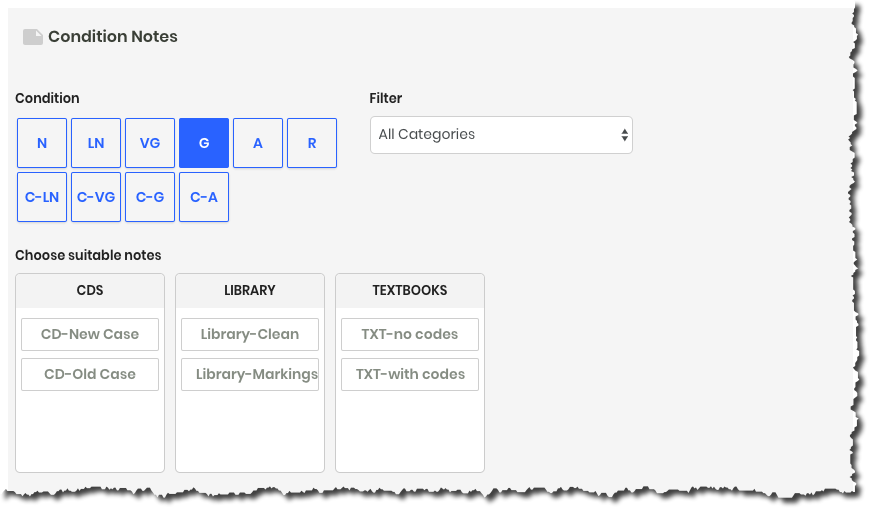
In the example below, we show you exactly how a seller might structure their notes for maximum efficiency while inside the batch for quick listing.

In every note you build you should:
1. Pick an overall Amazon category first such as Books, or Music, or Toys or Electronics
2. From there you will pick and name a sub-category
3. Assign that subcategory a nickname so you can easily spot it and select it for the listing
4. Type in your actual notes for the listing